Graphically change integration events
You can change the integration events in different ways:
By editing the values in the linked processing method
Graphically, by showing the events in the chromatogram and moving them with the mouse
This procedure explains how you graphically change the integration events.
Privileges
|
Prerequisites
|
-
Make the required settings in the Chromatogram Properties
 :
:On the Integrator events page, select the following check boxes:
Show timed events
Show initial events
Edit timed events
Show command hints
-
Right-click in the chromatogram approximately at the retention time where you want to add the event, then select Add integration event.
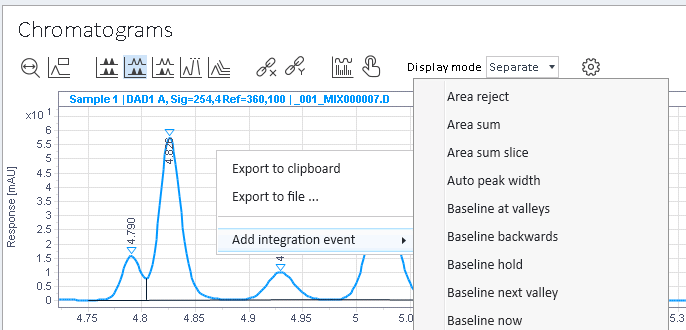
If the graph shows several overlaid chromatograms from different signals with specific integration events, you can also choose the relevant signal in the context menu. If it shows chromatograms using different methods, you can choose the relevant method.
-
Provide a value for the new integration event, and click
 to confirm.
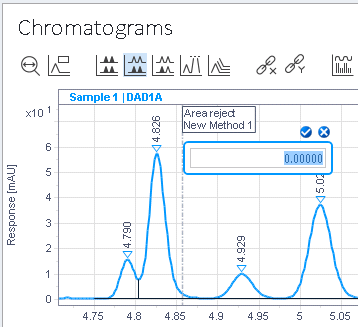
The integration event is added to the linked method and shown in the chromatogram.
Move integration events with the mouse
-
Move the mouse over the dashed line of an existing integration event.
The mouse cursor changes to a double-headed arrow. The command hint Move is shown.
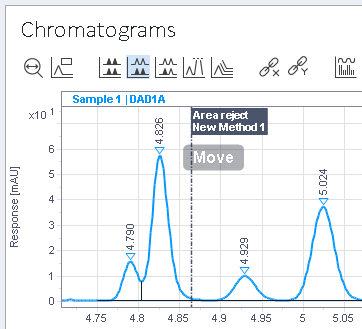
-
Drag the integration event to a new position.
Depending on the event type, you can move the start time, the end time, the entire event, or each of them individually.
Edit values of integration events
-
Keep the Ctrl key pressed while moving the mouse over an existing integration event.
The command hint Click to Edit Value is shown.
-
Click the integration event, and provide the new value.
-
Click
to confirm, or
 to cancel.
After you confirmed the new value, it is also set in the linked method.
base-id: 11015999755
id: 9007210270740747