Standard Autosampler Dashboard Panel
Module Graphic
The items in the standard autosampler graphic have the following meaning and function (items displayed depend on module type and configuration):
|
|
Displayed during an injector program, either internal or from the injector program/pretreatment table. The highlight moves during the injection. At the end of the run, the icon is removed. |
|
|
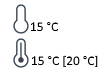
Displays the status of the sample thermostat, off (upper) or on (lower). This graphic is available only when a sample thermostat is installed.
|
|
|
Indicates that an External Contacts board is installed. |
|
| The syringe graphic shows a representation of the flowpath
|
|
|
Denotes an injection from a vial. The current sample location is shown to the right of the graphic. The tooltip displays the current tray configuration. |
Actuals
The following standard autosampler actuals are displayed:
|
Injection Volume |
The volume of the last injection (in µL). |
|
Sample Location |
The location of the last sample. |
Temperature | The sample thermostat temperature (in ° C). This actual is present only if a sample thermostat is installed. |
Context Menu
The context menu contains the following commands (available commands depend on module type and configuration):
| Displays the sampler's Control dialog box. |
|
|
Displays the sampler's Method Setup dialog box. |
|
|
Displays the sampler's Injector Program. |
|
|
|
|
Causes the LED on the front of the module to blink for a few seconds. |
| Moves the gripper arm to its home position to allow you to remove the tray. |
|
|
Sends a reset signal to your autosampler. During the reset, the injector is in a Not Ready state (yellow). |
| Moves the gripper arm to the front, outside the vial tray and releases the vial from the gripper arm. |
|
|
Switches the autosampler thermostat on. |
|
|
Switches the autosampler thermostat off. |
|
|
Switches the valve from the main flow path to bypass. |
| Switches the valve from bypass to the main flow path. |
|
|
Switches the tray illumination on or off. |
|
Choose what to modify from the submenu: |
 Control
 Method
 Home
Arm
Home
Arm Reset Sampler
 Release
Vial
Release
Vial Switch On
 Switch Off