Select signals from the 2nd dimension
The Signal Selection tab of the Sampling Table displays the ²D detector signals for your injections. Depending on the check box status in this tab, the signals are shown or hidden in the other windows such as Chromatograms ²D, Contour Plot 2D, or Diagnostic Signals.
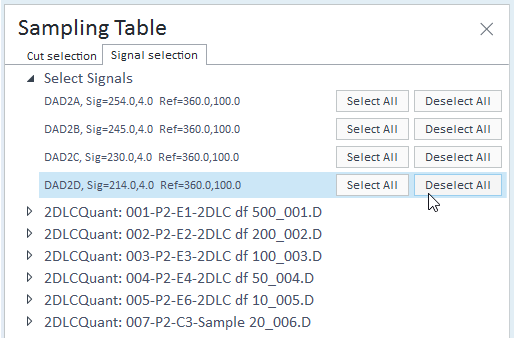
Select ²D signals for multiple injections
-
In the injection tree, pin the relevant injections.
-
Expand the Select Signals section. It lists all ²D detector signals available for any focused or pinned injection.
-
Click Deselect All for a signal to hide it for all pinned injections and for the focused injection.
Click Select All for a signal to show it for all pinned injections and for the focused injection.
Select ²D signals for all cuts of an individual injection
-
Navigate to the relevant injection.
-
Select or clear the check boxes as required.

Your selection is used for all cuts of this injection.
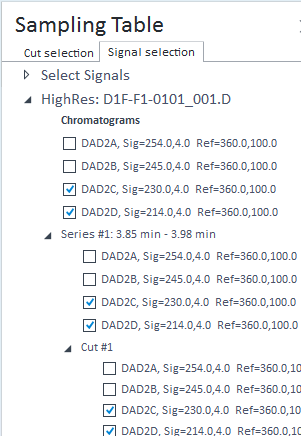
Select ²D signals for individual cuts
-
In the injection tree, select the relevant injection.
-
In the Cut selection tab of the Sampling Table, select the cut or cuts for which you want to select specific signals (see Select cuts).
-
In the Signal selection tab, navigate to your desired cut and expand it to view the signal list.
-
Select or clear the check boxes as required. You can select different signals for individual cuts.
A check box filled with a square (
 ) indicates that further down in the hierarchy there is at least
one item for which this signal is selected while it is deselected for the other
items. If you clear this check box, the corresponding signal will be deselected
for all items.
) indicates that further down in the hierarchy there is at least
one item for which this signal is selected while it is deselected for the other
items. If you clear this check box, the corresponding signal will be deselected
for all items.Your selection is used for the selected cuts.
Select UV or MS spectra from the 2nd dimension
-
All UV or MS spectra that you extracted from ²D signals are listed under Extracted Spectra in the Signal Selection tab of the Sampling Table window.
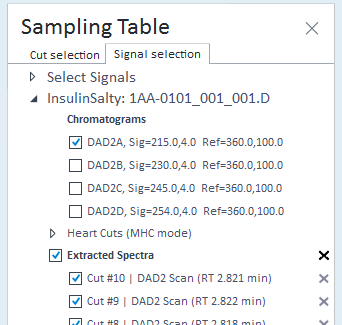
All spectra for which you select the check boxes are shown in the corresponding window (UV Spectrum or MS Spectrum).
See Also
base-id: 10237214859
id: 10237214859