View sample trays
If you are using an LC instrument with a Multisampler or standard sampler, you can view your sequence in the sample tray. After the trays have been positioned in your Multisampler, edit the 3D image of your trays, and then view your sequence in a tray. Only the user controlling the LC instrument will be able to reconfigure the instrument. Any attempt to reconfigure the instrument is recorded in the Activity Log.
Click Show sample trays.
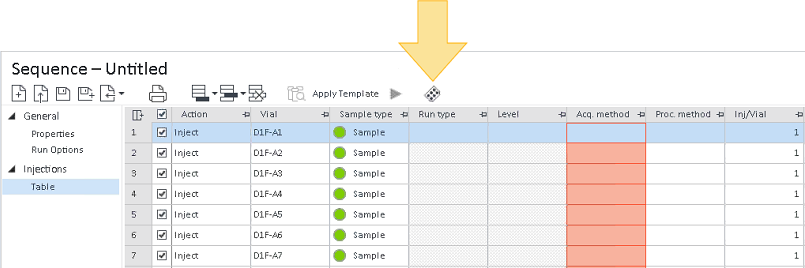
The sample tray appears as a floating window that you can click and drag to any location. Sample trays are displayed on the left, and fraction/recovery trays are shown on the right.
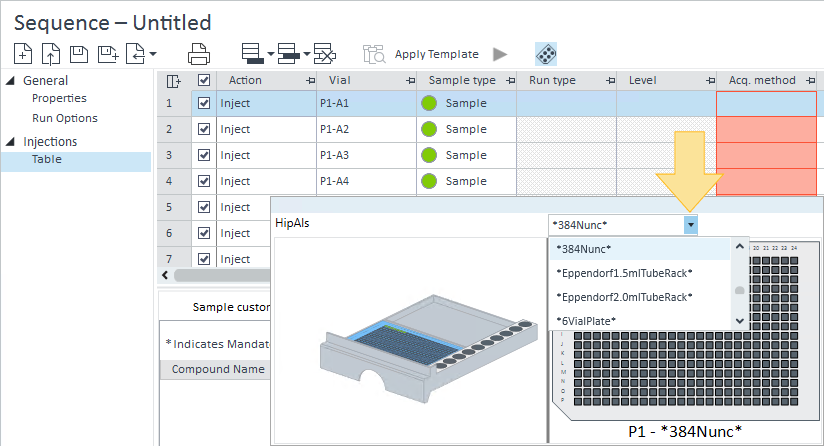
Set up the 3D image to match the physical trays in your Multisampler. If you are using a standard sampler, the correct tray type will automatically be detected by the instrument and display.
To select the specific tray being used in the Multisampler, select the tray in the 3D image, and select the tray type from the drop-down list.
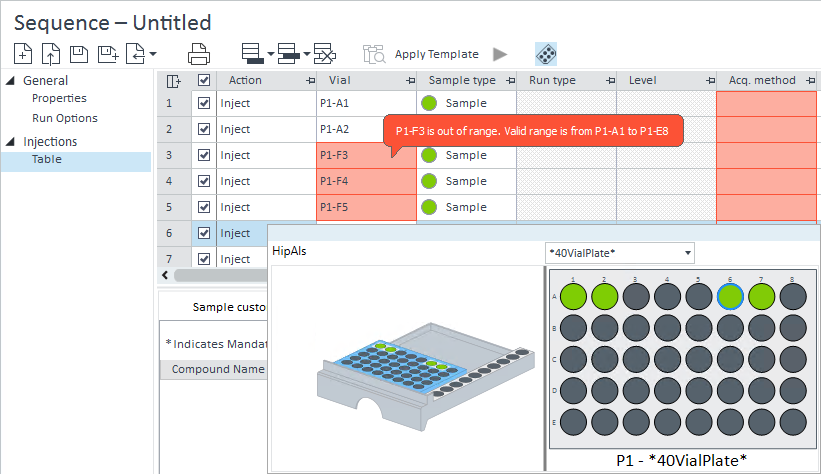
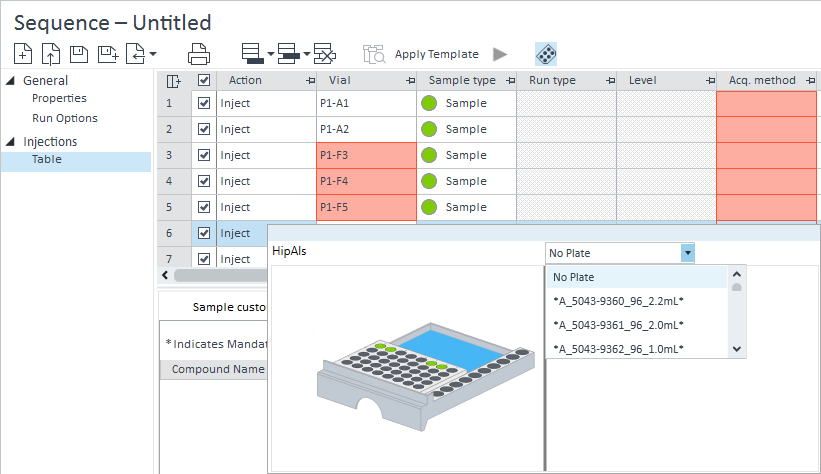
If you change your tray type, the available vial numbers may also change. If your sequence table contains injections assigned to a vial location that does not exist on the tray, the sequence rows will become invalid, and you will not be able to run the sequence. To validate the rows, you can change the vial location or delete the invalid rows.
To add a tray to a Multisampler 3D image, select a blank space in the 3D image, and select the tray type from the drop-down list.
Select a tray in the 3D image to view the sample configuration for that tray. The tray highlighted in blue is the tray configuration displayed.
If you add a row to your sequence table or change the Sample type in your sequence table, the vial location in the tray updates automatically. If there are multiple rows with the same vial location, the sample type of the latest injection row determines the color of the vial location.
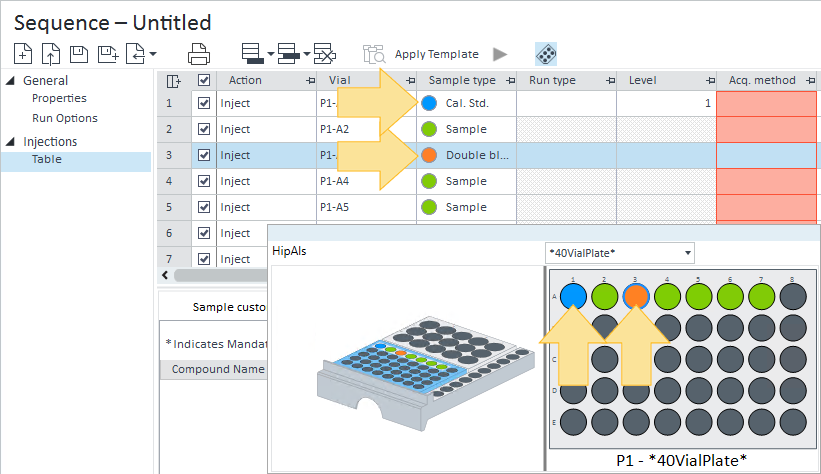
The vial location in the sample tray displays a color based on the sample type and injection status:
Red highlight: Aborted
Light blue highlight Acquiring
Light green highlight: Acquired
Green: Sample
Blue: Calibration standard
Grey: Blank
Purple: QC check
Orange: Double blank
Magenta: Spike
Brown: System Suit
Clear/white: None
base-id: 12675072651
id: 12675072651