Configure a GC and GC/MS in OpenLAB
-
Be sure both instruments are turned on and connected to the same network as your OpenLAB Control Panel.
-
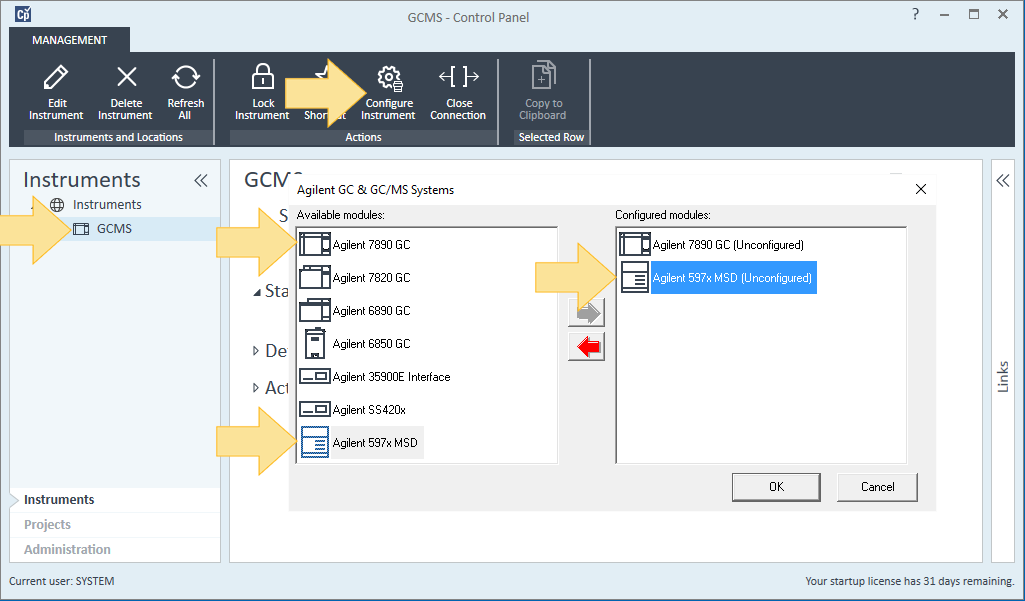
In the Control Panel, with your instrument selected (My GCMS in this example), click Configure Instrument.
-
Under Available modules, double-click the components included in the instrument: Agilent 597x MSD, and Agilent 7890 GC (for example). This moves both to the configured modules column.
-
In the Configured modules column, double-click each module, one at a time to display the configuration box for that module. See to configure the MSD, and to configure the GC.
To Configure the 597x MSD
The configuration box for the Agilent 597x MSD is similar to the one below.
-
Enter the IP Address for this instrument in the highlighted box.

-
Click Get MS Configuration. See Update firmware for details on updating your firmware, if necessary.
-
Verify that the column is configured to the correct detector. (GC Front Inlet is selected in this example.) If your MS is not configured with a GC, be sure to select Other for this box.
-
Select the ion source installed in your instrument. (EI, CI, or HES)
-
Verify the Quad DC Polarity, as shown on the analyzer side door, is correct for this source.
-
If your instrument has a gas controller, click Gas Control Configuration to define your controller type and gas configuration.
If your instrument does not have a gas controller, skip this step.
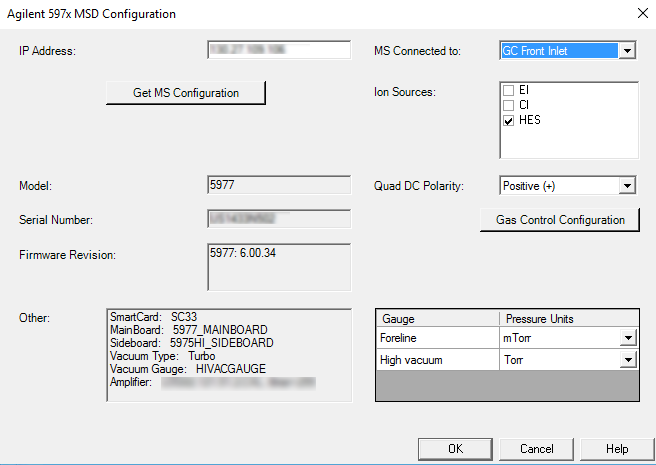
The Gas Control Configuration dialog you see will be based on the source you identified.
For details on configuring your specific ion source, see one of the following:
Configure a CI source with JetClean (597x)
Configure an HES or EI source with JetClean (597x)
Configure an HES or EI source without JetClean (597x) -
After completing the Gas Control Configuration, you are returned to here once again. Click OK to complete the configuration.
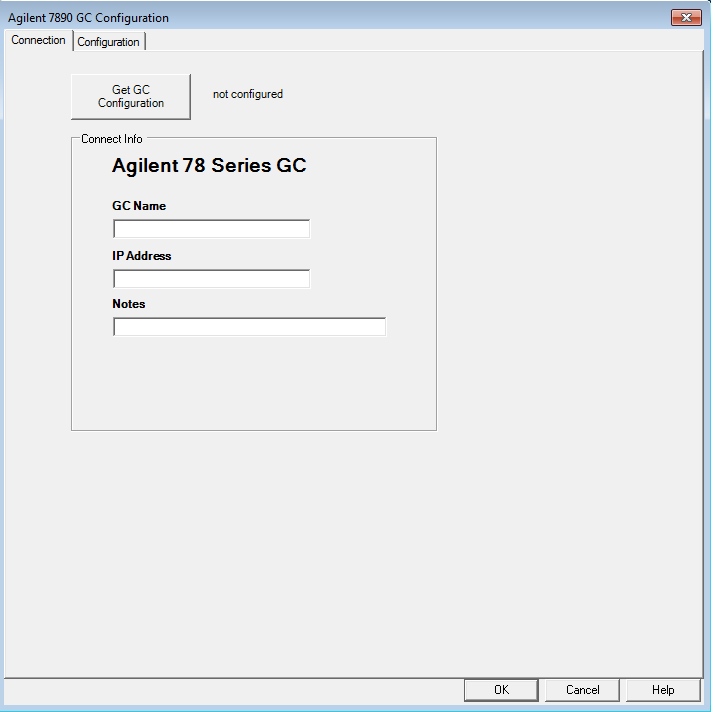
To configure the GC
- Enter the IP address for this instrument, and optionally enter a GC Name and Notes.
- Click Get GC Configuration.
- Click OK.
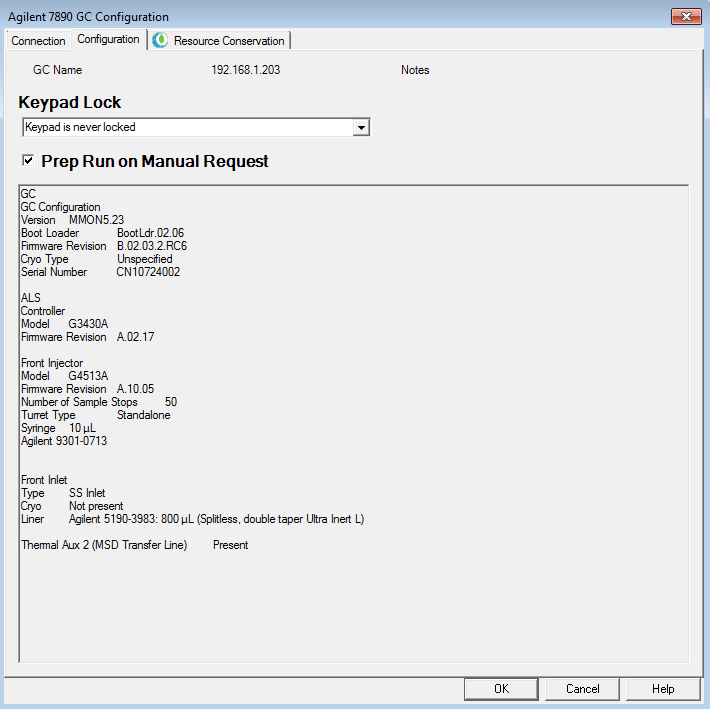
- Review the entries on the Configuration Tab.
For Keypad Lock, you may select from any of the following options:-
- Keypad is locked during runs - Disables the GC keypad during runs.
- Keypad is locked while under software control - Disables the GC keypad duirng live instrument sessions.
- Keypad is never locked - Enables the GC keypad at all times.
For the Prep Run on Manual Request - Normally, the data system sends a Prep Run command at the start of every run. This command makes sure the GC is prepared before starting an analysis.
-
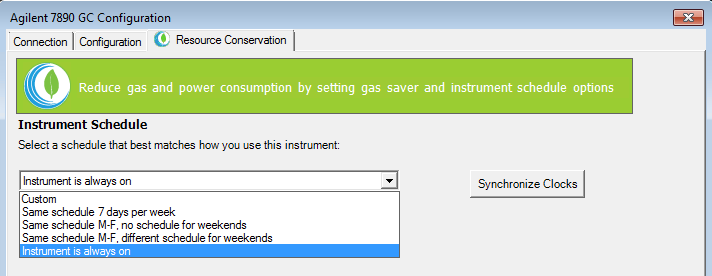
- In the Resource Conservation tab, select an option from the Instrument Schedule drop down list that best represents the use of this instrument. This could help reduce gas consumption and power usage during periods of inactivity.
The Synchronize Clocks option will update the GC clock to the clock on associated instruments, to match your PC clock.
- Click OK when you have completed your entries.