Add a project
Add projects for OpenLab CDS, OpenLab CDS EZChrom edition, OpenLab Data Analysis, or OpenLab CDS ChemStation Edition (if generic projects are enabled for your system). If you are using OpenLab ECM Intelligence Reporter, see Add a reporting project. To create a copy of an existing project, see Duplicate a project.
-
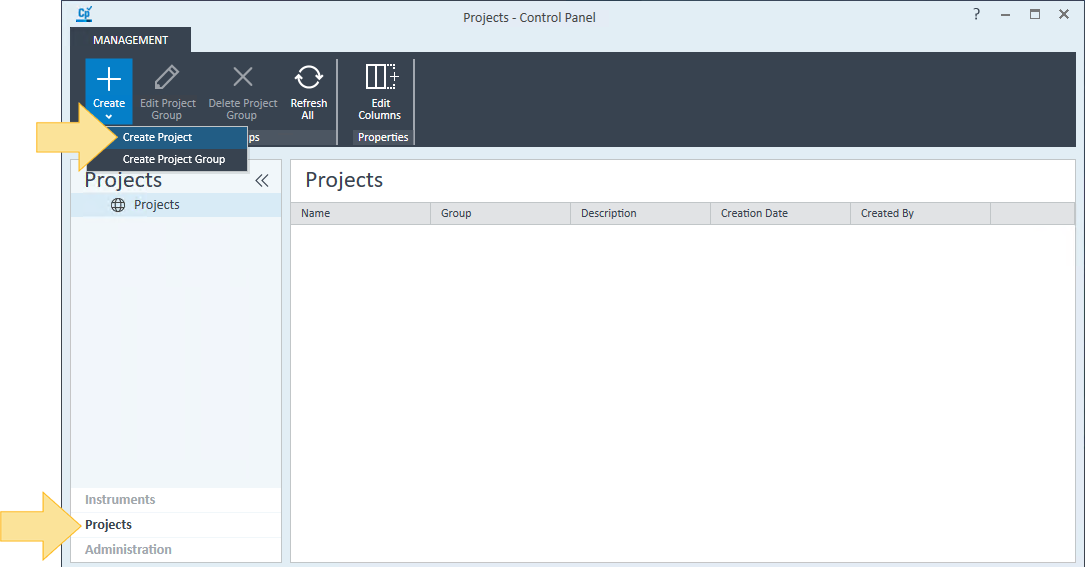
Click Projects, and select
 or any project group.
 Click Create > Create Project.
In the Name text box, type a name for the project.
Select Include project groups in project path to include the project group name in the Project folder path.
In the Project folder path text box, you can leave the default folder path, enter the path to the folder, or click Browse and navigate to and select the folder. The maximum file path length is 256 characters. If the root folder was specified during a Standalone Workstation installation, it cannot be changed.
If you want to use an existing ECM storage location for a new project see Add a new project to an existing ECM locationIn the Description text box, type a description of the project.
Select an Application to create an application-specific project. You can select more than one application. If no application is selected, a generic project will be created.
If applicable, click the Settings tab for your application. The tabs shown are based on your Application selection.
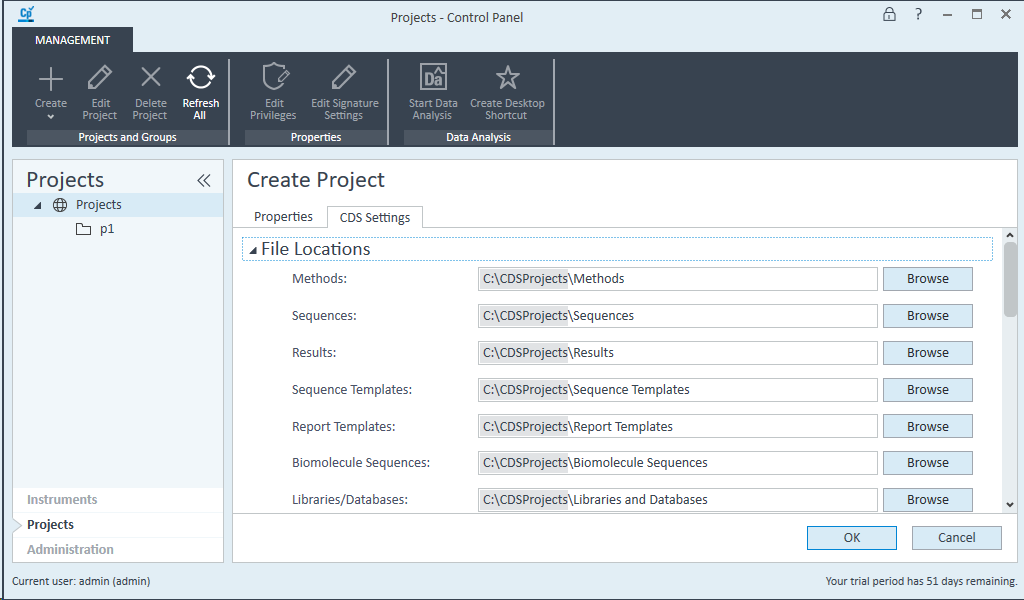
Expand File Locations.
The file paths are automatically generated based on the Project folder path specified in Step 4. You can change the names and paths as follows: of all file locations; however, the paths for Methods, Sequences, and Results must be within the root project folder.
Methods, Sequences, and Results must be within the project folder.
Report Template, Biomolecule Sequences, and Libraries/Databases can be located outside the project folder, but within the path specified in Step 4.
Biomolecule Sequences, and Libraries/Databases folders are used by MassHunter applications.
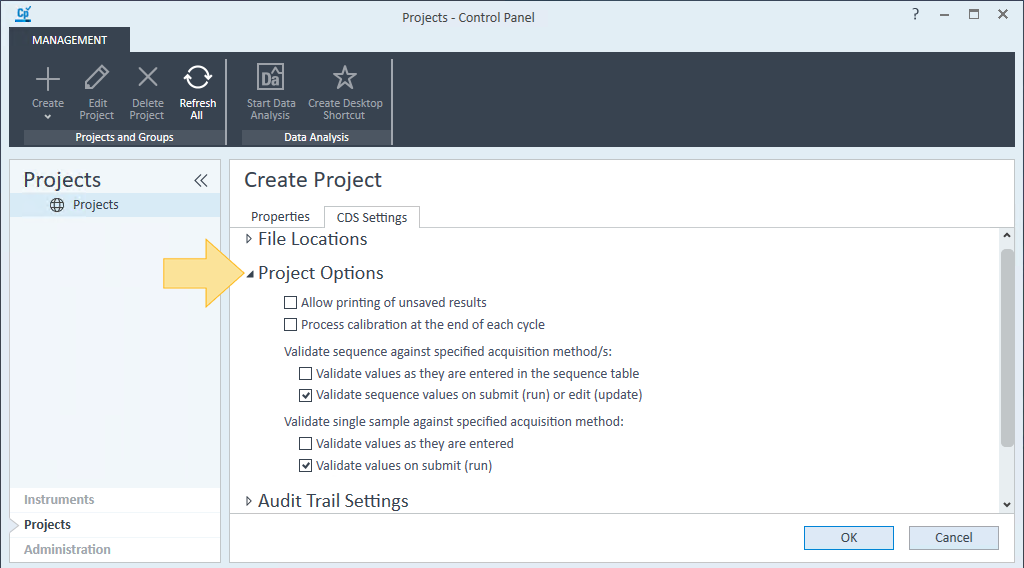
Expand Project Options.
Select Allow printing of unsaved method and results to print reports without saving data or results after reprocessing.
Select Enforce method approval to prevent users from using generic or obsolete methods unless they have the appropriate privileges. Only approved methods can be used by users without specialized privileges. See Use method status for more information.
If Process calibration at the end of each cycle is not selected, calibration standards acquired within this project are processed and printed at the end of their acquisition. Amounts and concentrations for calibration standards are computed with interim curves.
If this option is selected, result processing and report printing for a set of calibration standards is delayed until all calibration runs of this set are completed. there are no interim calibration curves.
For sequences and single samples, select these options:
Validate values as they are entered in the sequence table or Validate values as they are entered: The acquisition method, volume, and override parameters are automatically checked against the method and highlighted in red if there is an issue, and the Run button is available. The run cannot be submitted until all values are valid.
Validate sequence values on submit (run) or edit (update) or Validate values on submit (run): Upon clicking Run, the acquisition method, volume, and override parameters are checked against the method and highlighted in red if there is an issue. If at least one parameters is invalid, an error message displays describing the invalid values. The run cannot be submitted until all values are valid.
If no validation option is selected, the run can be submitted with invalid values. If at least one value is invalid, the run is aborted.
If both validation options are selected, validation occurs as values are entered. If another user simultaneously modifies the acquisition method, the validation is also performed on submit to take into account the last modifications done by that user.
Optional: Add custom parameters to your project.
Expand Audit Trail Settings.
Select the required options for each audit trail.
The Method Audit Trail is available in Data Analysis and in the Acquisition Method window in Acquisition.
Method Audit Trail settings also apply to the Task Audit Trail and Sample Prep Method Audit Trail in Acquisition.
The Sequence Audit Trail is available in the Sequence table in Acquisition.
The Results Audit Trail is available in the Data Processing pane in Data Analysis.
The Report Builder Audit Trail is available in the MassHunter applications Qualitative Analysis and BioConfirm.
Reasons to be added: You can predefine reasons for all or for specific audit trails. Predefined reasons are shown in a drop-down list when users save their work.
Allow users to type their own reason: If selected, users are allowed to type their own reasons when saving their results or methods.
Automatically enable audit trail: Only available for optional audit trails. If selected, the respective audit trail is turned on and cannot be turned off again.
Prompt for reason: If selected, users must provide a reason for the modifications they have done prior to saving.
Allow users to automatically apply same reason for all injections: If selected, users can apply the same reason automatically across multiple result sets or injections. This setting applies to both OpenLab CDS Data Analysis and MassHunter Data Analysis applications.
On the Results tab, select Prompt for reason when saving results and aborting run queue items to prompt users to enter a reason for aborting a run in Acquisition.
Click OK.
base-id: 12236686603
id: 36028809255650571